Phew, it’s been a while since I published something on our page – my previous post on dealing with brown spots on indoor plants was 9 months ago! With the pandemic not showing any signs of slowing down and being stuck in our tiny island city-state, we decided to ‘spice’ things up and try creating our own caladium hybrid. 🤓
Firstly, how are caladiums propagated?
The simplest and quickest way to propagate caladiums is to divide their tubers. If you’re not familiar with tubers and how they look like, just imagine that each caladium stem is attached to a ‘potato’. To divide the tuber, simply use a pair of sharp gardening scissors to chop it up. New leaf shoots should sprout out pretty quickly after planting (in a warm climate), but do take note that the smaller the tuber/the more you split them, the smaller your leaves will be (initially). For more details, you can refer to our previous post on planting caladium bulbs!
Another method is through seed propagation. The process is significantly longer, but a necessary one if you are looking to hybridize your caladiums. In theory, propagation by seed seems pretty straightforward. Like most flowering plants, pollination is done by cross-pollinating flowers from different plants and harvesting seeds from a ripened fruit. However, not that simple in practice…
Should you let your caladiums bloom or cut off their flowers?
It depends! The draw of caladiums is in their beautiful foliage (like many other houseplants). So if you are not intending to pollinate them, we would recommend snipping off the flowers once they start growing. Flowering is an intensive process for plants, so snipping them off early will give the plant more energy and nutrients for foliage and tuber growth.
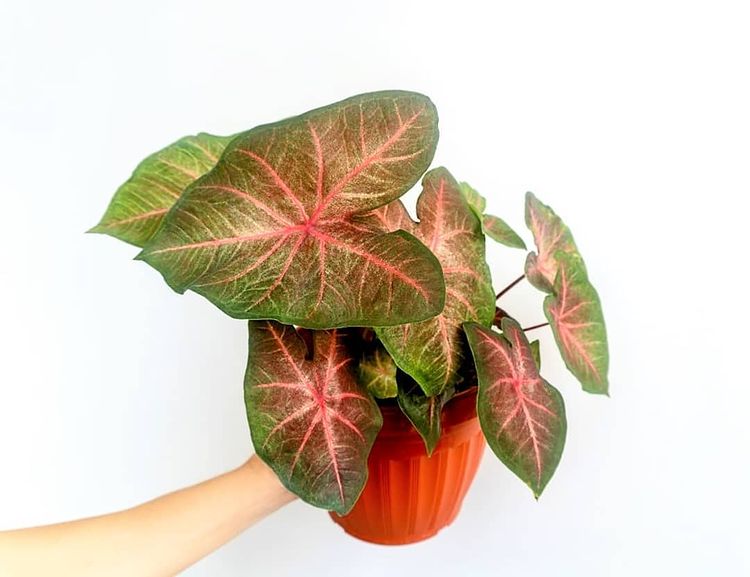
PS. We pollinated the flowers of these two different caladium cultivars

Nevertheless, we’ve left our caladiums to bloom a couple of times just to see how the flowers look like. Our plants definitely did not die 😆 but looked slightly weaker than before.
How do you pollinate caladium flowers?
1. Identify the parts of a caladium flower
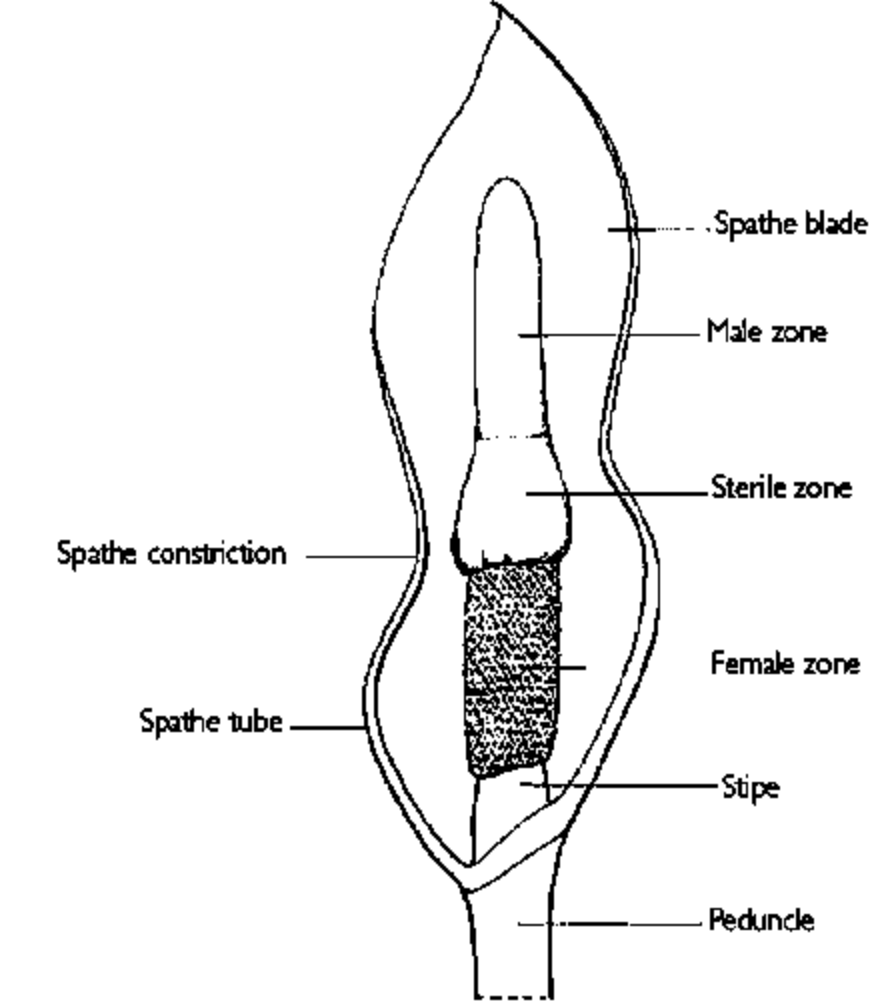
Before we go into the actual pollination steps, it is important to identify the ‘male’ and ‘female’ parts of a caladium flower.
The image on the right is a cross-section of an aroid flower. In most cases, the ‘female zone’ is rarely seen and typically hidden inside the flower.
Pollination takes place when the ‘female zone’ receives pollen from the ‘male zone’ (of another plant).
2. Pollinate only when the time is right
Caladiums are protogynous plants. What this means is that its female parts are receptive before the male parts shed pollen. In other words:
- Self-pollination is impossible
- Different flowers must be used. The female part of one flower has to be pollinated from the pollen of another flower
That aside, there is a specific timeframe when the female part of the flower is receptive to pollen. If it’s too early or too late, the pollination will not succeed. Since most of us do not own caladium farms and the chance of us having two caladiums flowering consecutively within that specific timeframe is extremely low… here’s a pro tip: collect the pollen from one flower and put it in the freezer. When the other flower is ready to receive pollen, you can use the frozen pollen for pollination. 😁✌🏻 Do take note that the fresher the pollen the higher chance of success – so don’t store it for too long either!
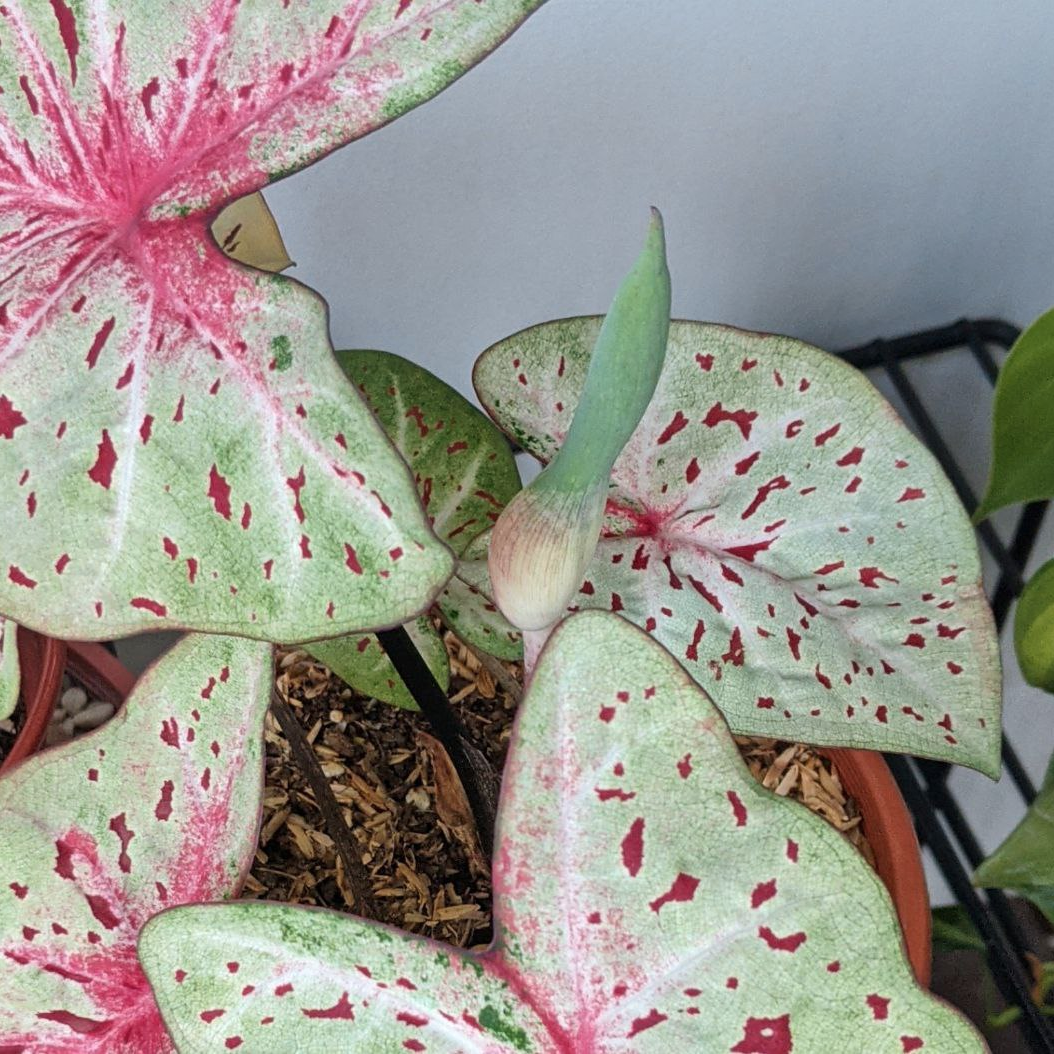
When is the female part of a caladium receptive to pollen?
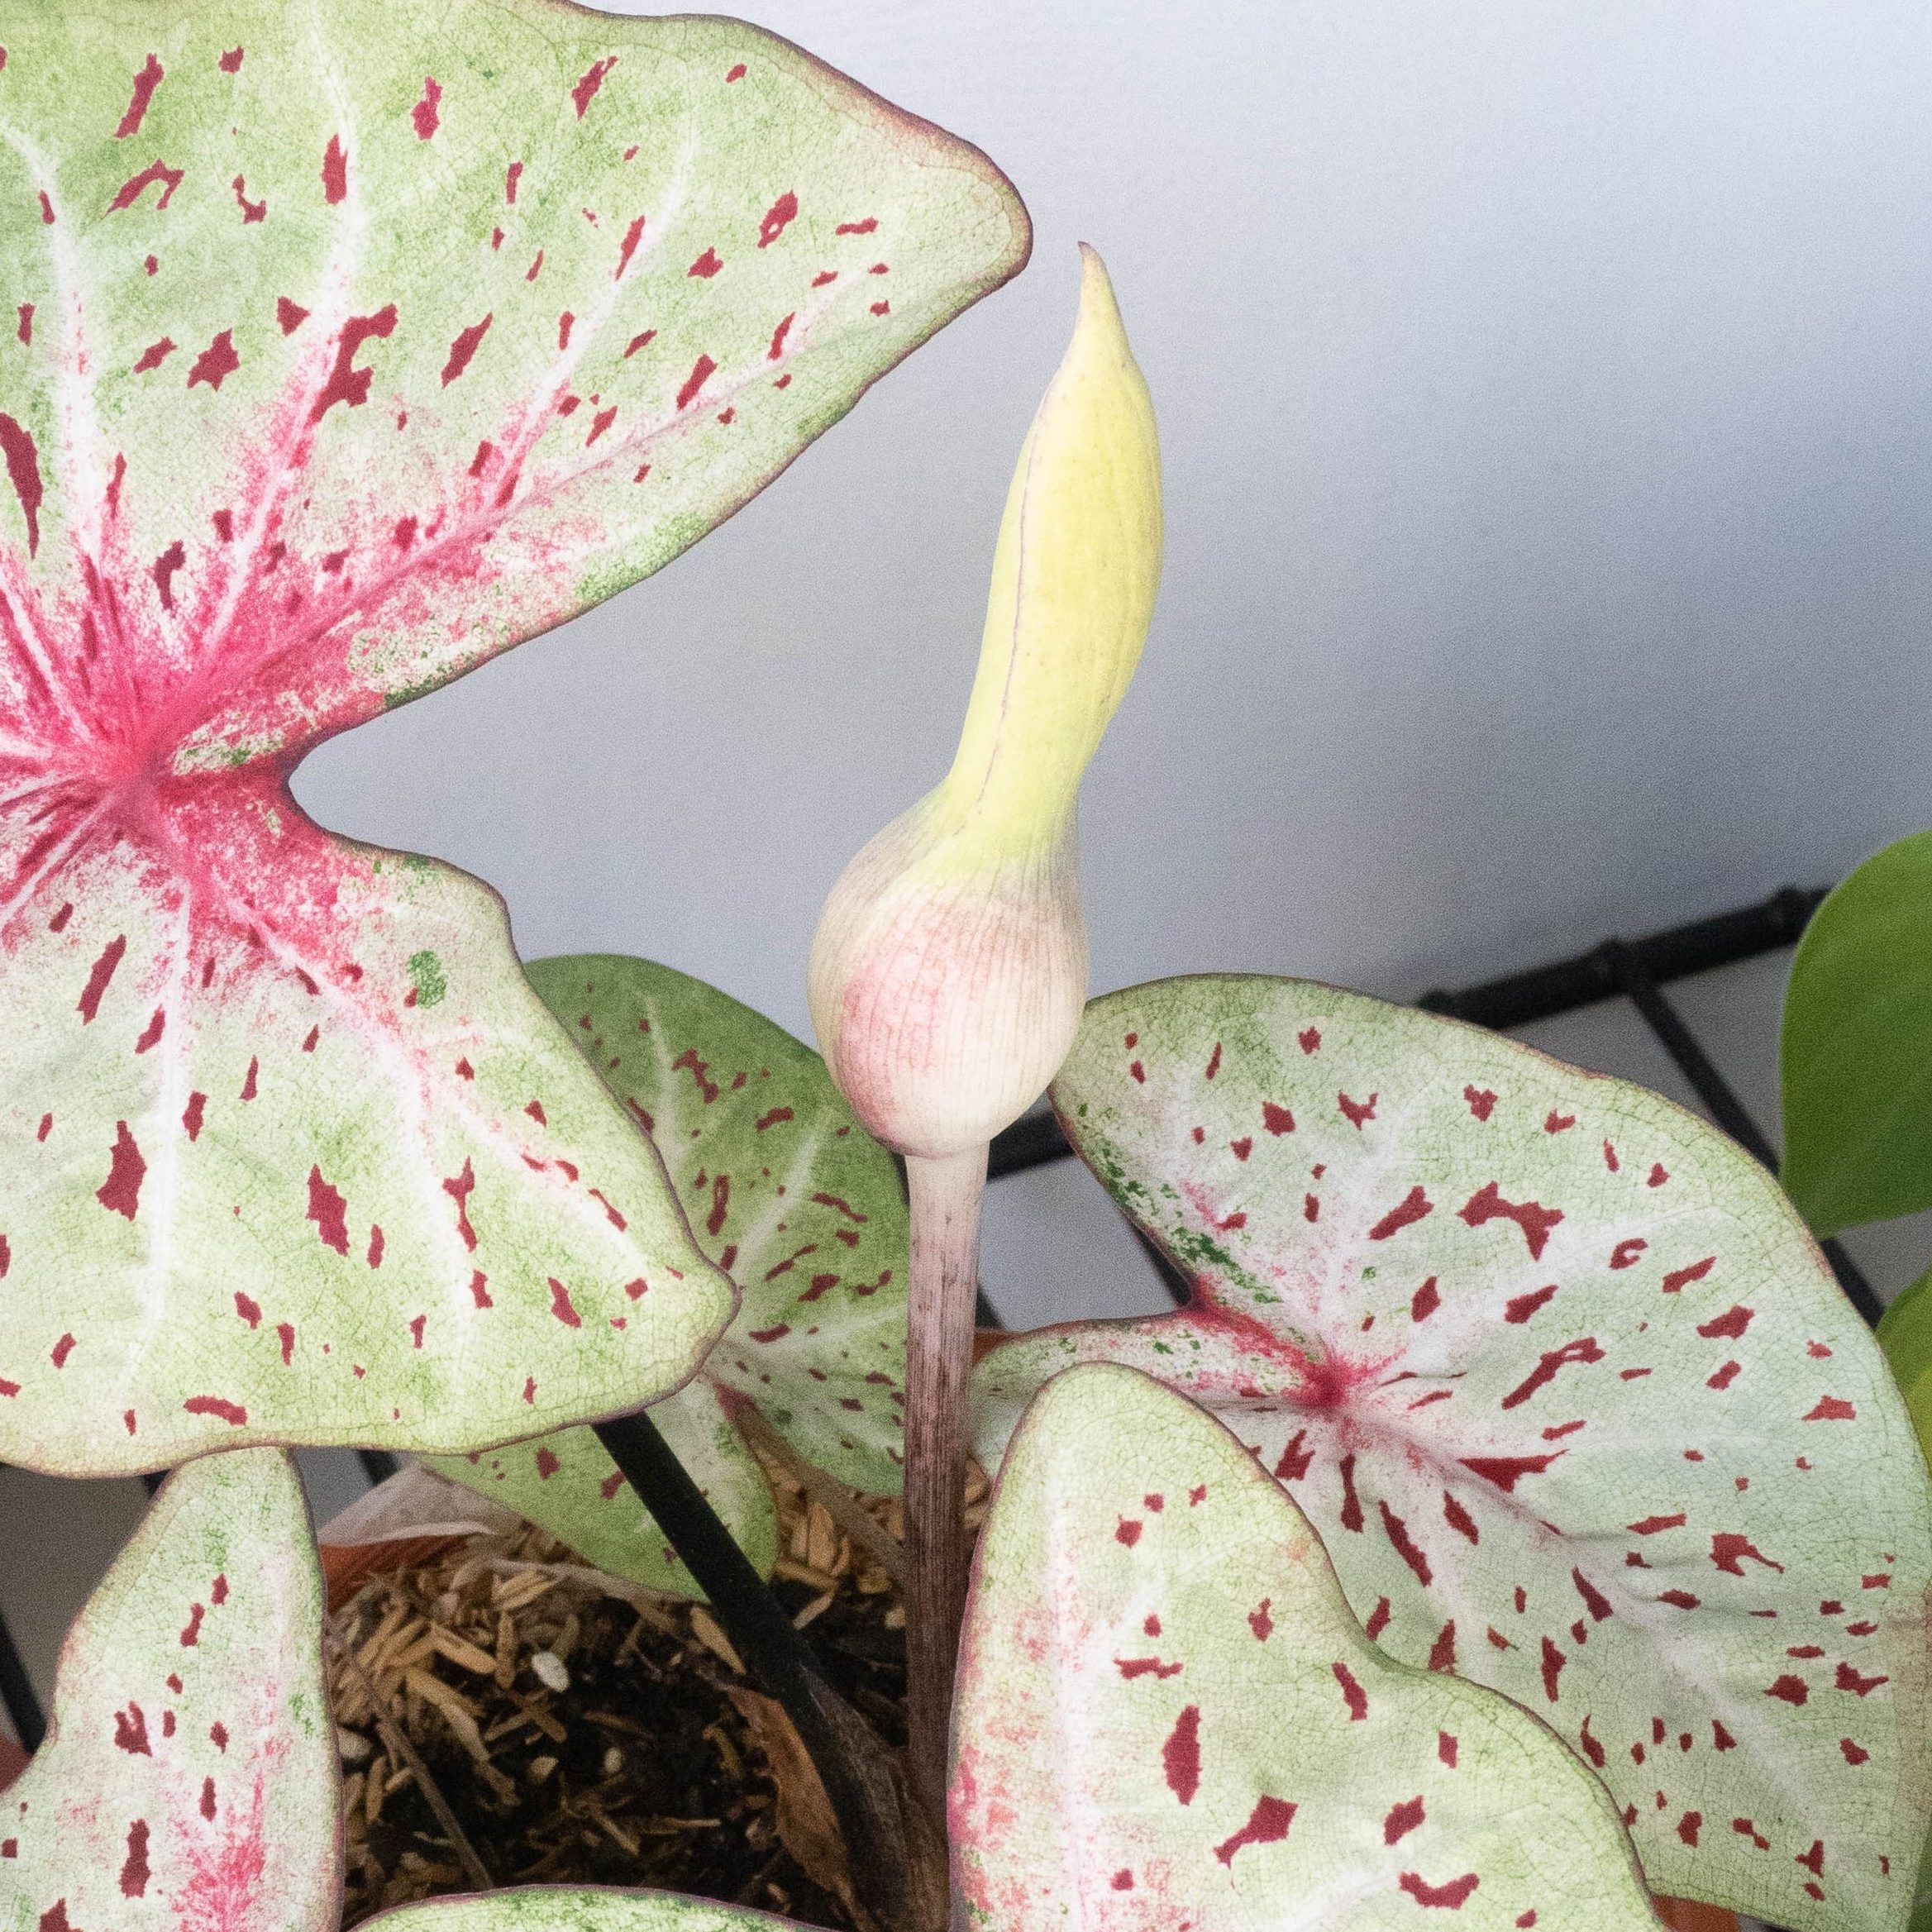
When the female part of a caladium flower is ready to receive pollen, the top part of the flower should be pale green to almost yellow. If the top is still green, this means that the female part is not ready yet. The bottom part of the flower should be bloated or swollen at this point in time, which is a few days before the flower unravels.
When is the male part ready for pollen collection?
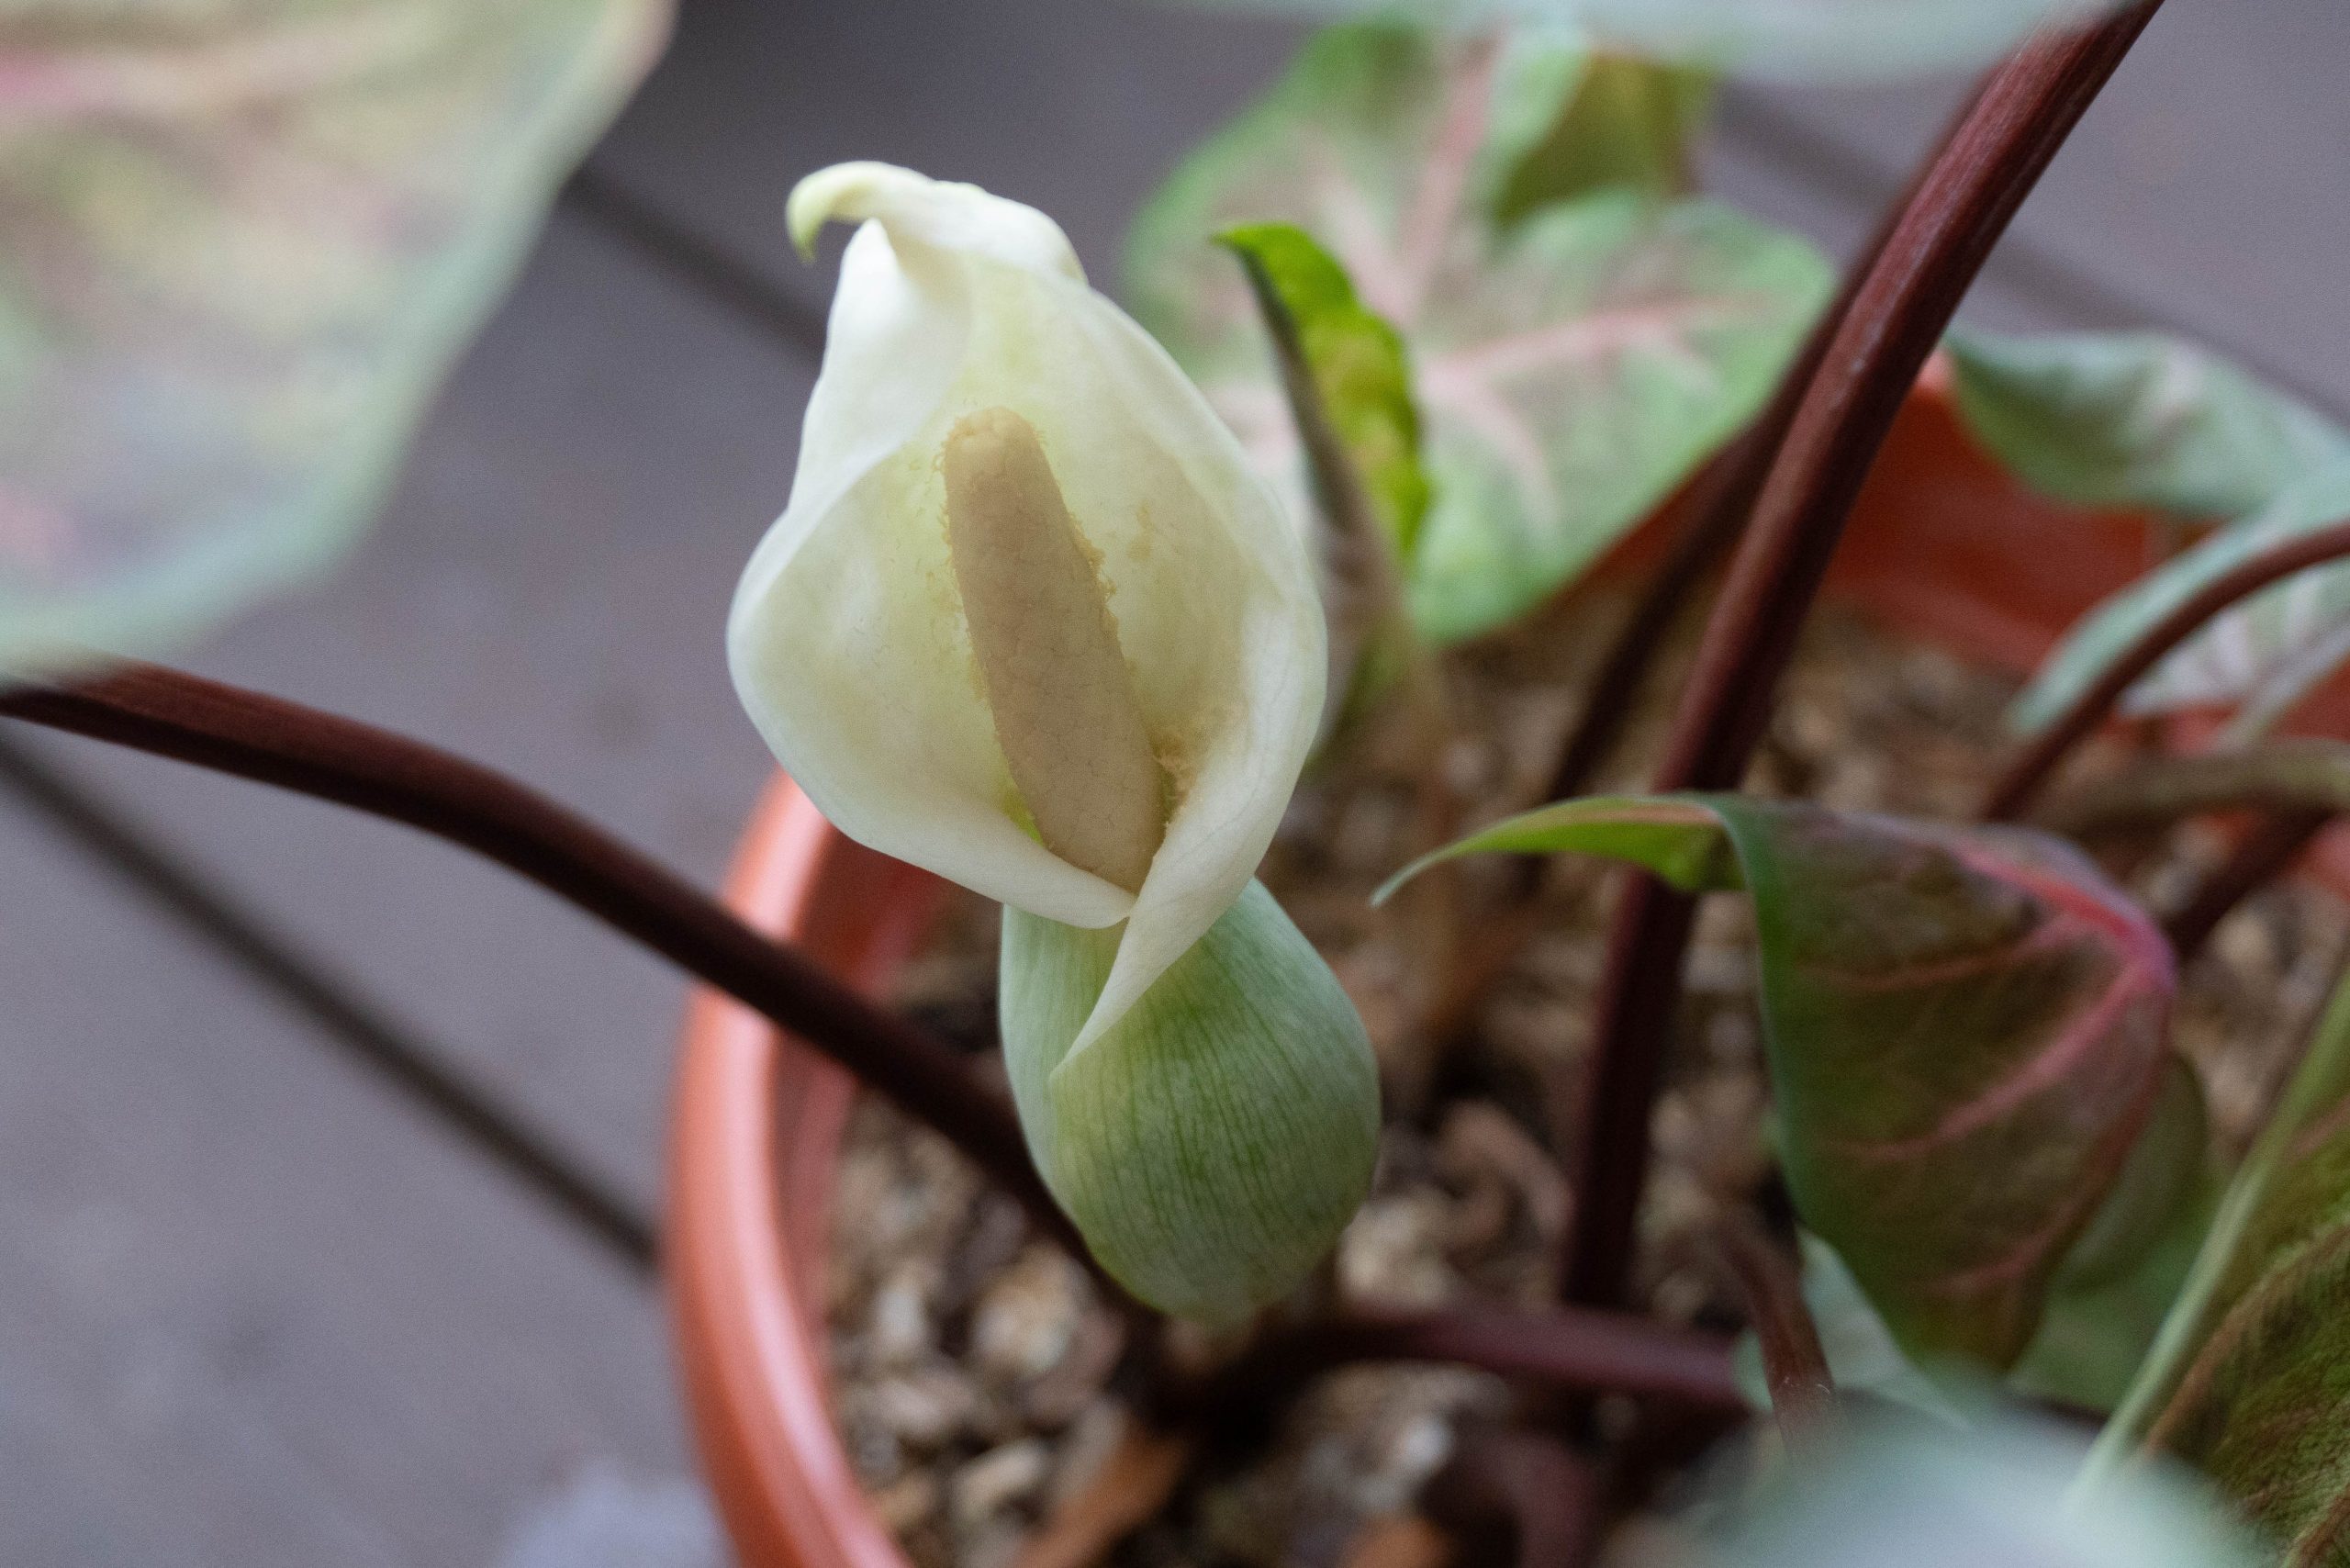
On the other hand, if the flower starts to unravel with the male part exposed, the female part is no longer viable to receive pollen. In this case, just wait a couple of days for the pollen to appear on the male part. We noticed that the pollen tends to appear in the morning, and disappear at the end of the day.
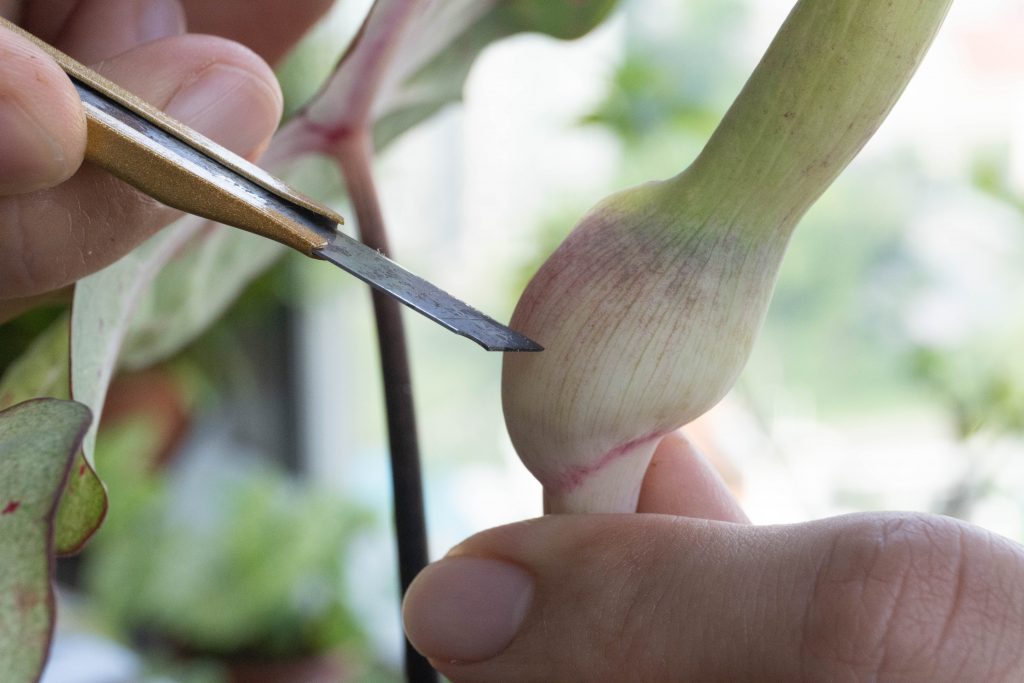
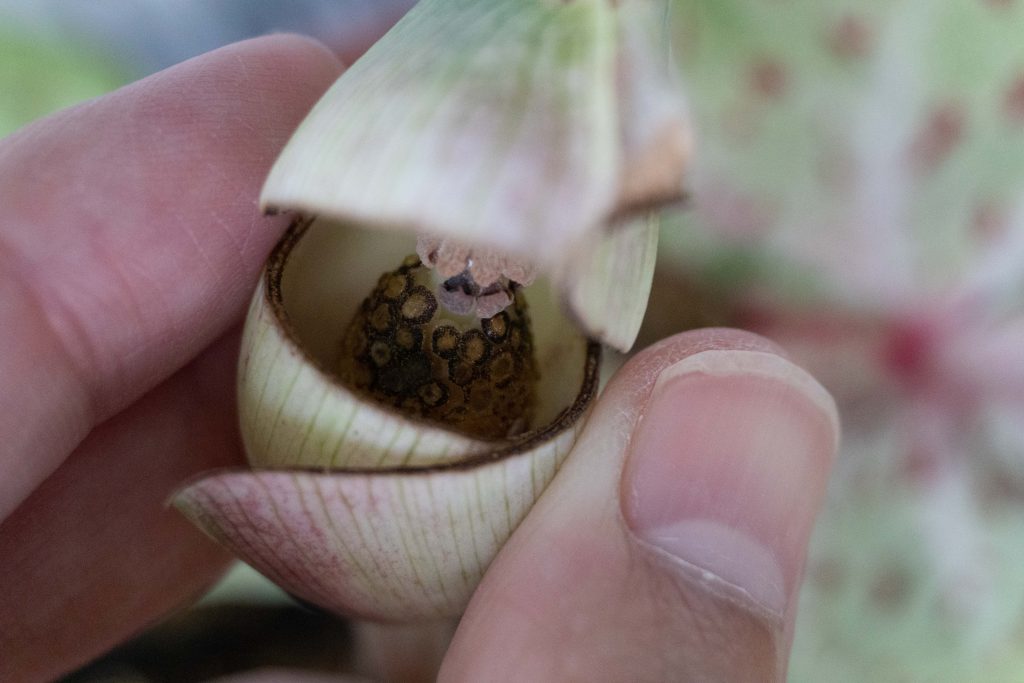
3. Cut a small opening at the bottom of the flower receiving the pollen (the ‘female’ part)
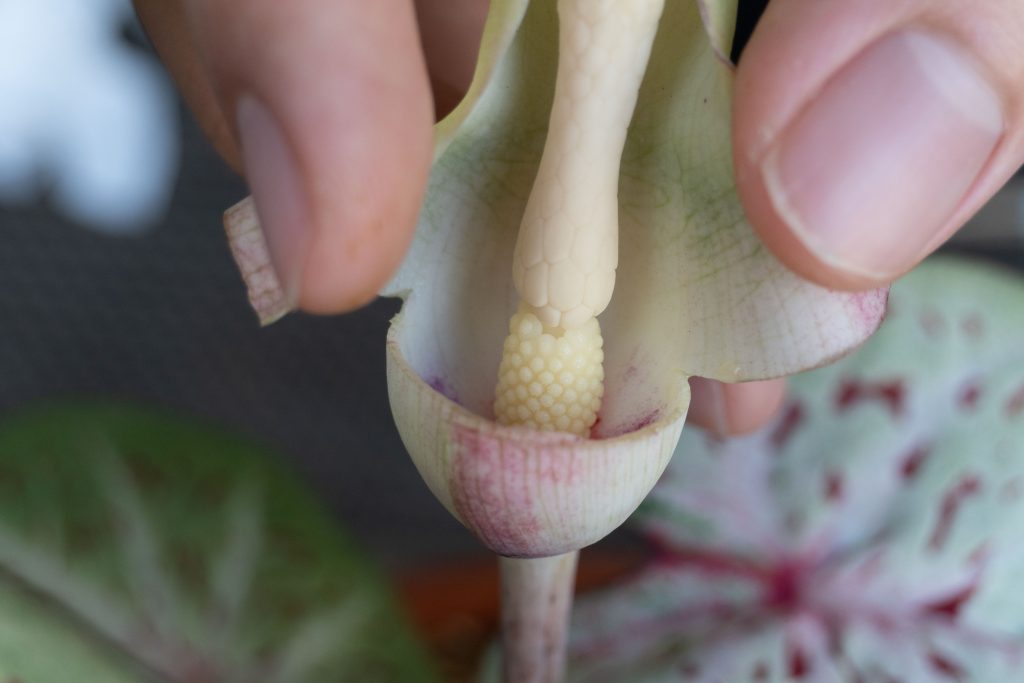
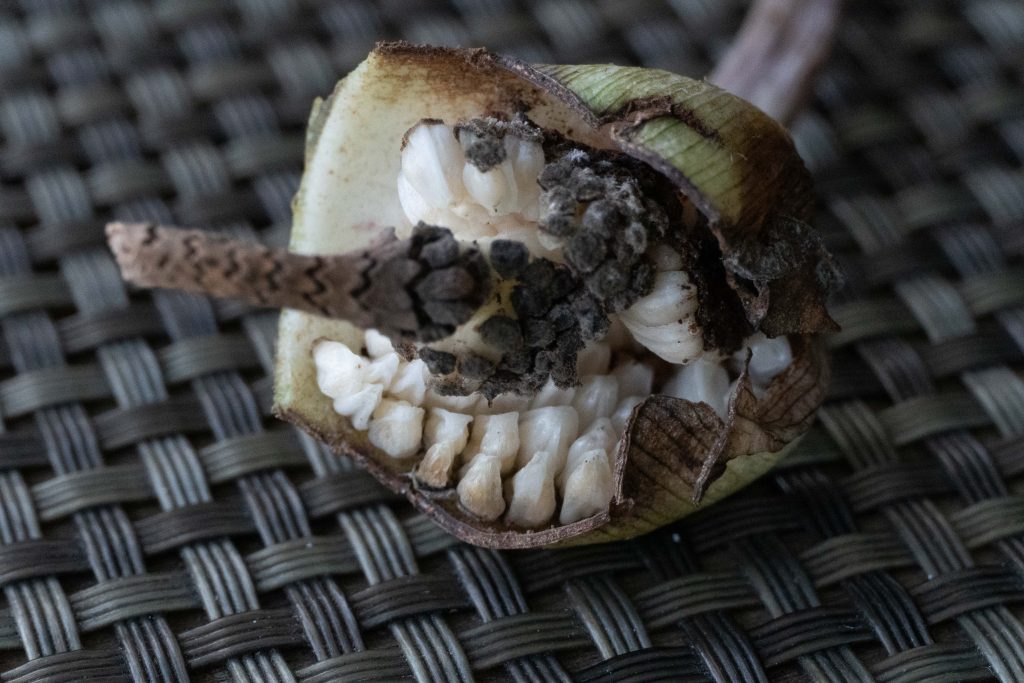
For the flower with the ‘receptive’ female part, use a penknife to cut a small opening at the bottom of the flower. This is the part of the flower that is bloated. Doing so should expose the female part of the flower; the section with a beehive-like pattern.
Fun fact: How do caladiums get pollinated in the wild?
So while we were researching about pollinating caladiums, I got curious about how these fellas get pollinated in the wild – because, cutting an opening in the flower, freeze-drying pollen, and catching the exact time to pollinate – isn’t exactly natural.
Interestingly, some believe that pollination is done by an insect (e.g. Cyclocephalini beetles) that bores a hole in the spathe in search of nectar. This insect should have also visited other caladium flowers beforehand. Fertilisation occurs when some of the pollen attached to its legs and body comes in contact with the receptive female part.
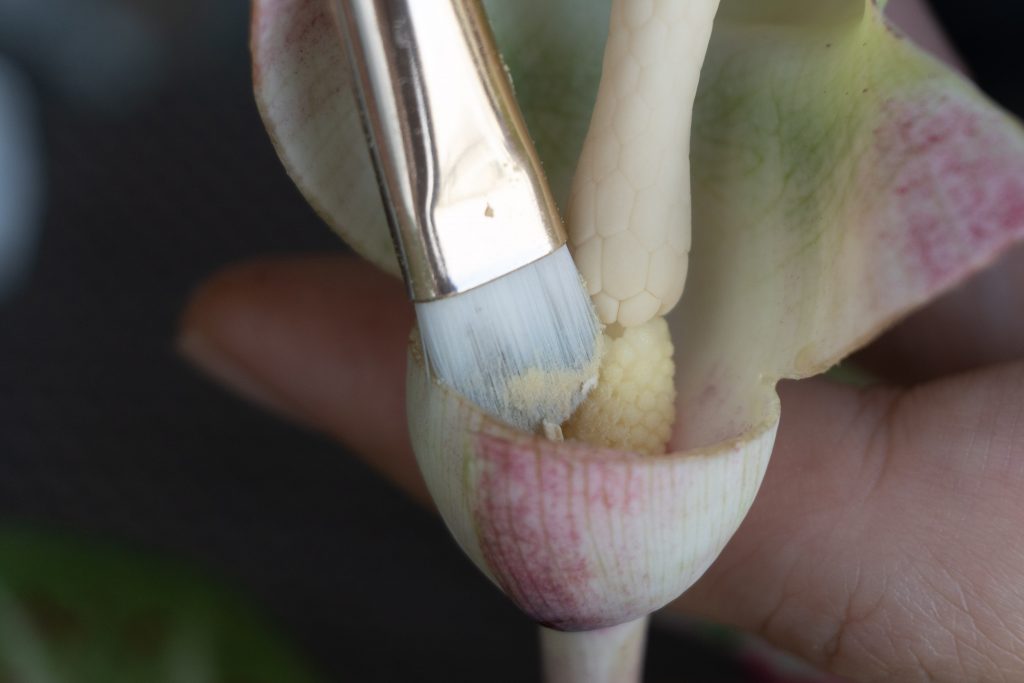
4. Use a brush to slather pollen on the female part of the flower
Whew! Now going to the easiest part – just grab a brush, and slather a bunch of pollen onto the female part of the flower. After trying out various tools for hand pollination, we settled on these cheap makeup brushes from DAISO (just SGD 2 for one). Have been working pretty well for hand pollinating cacti too!
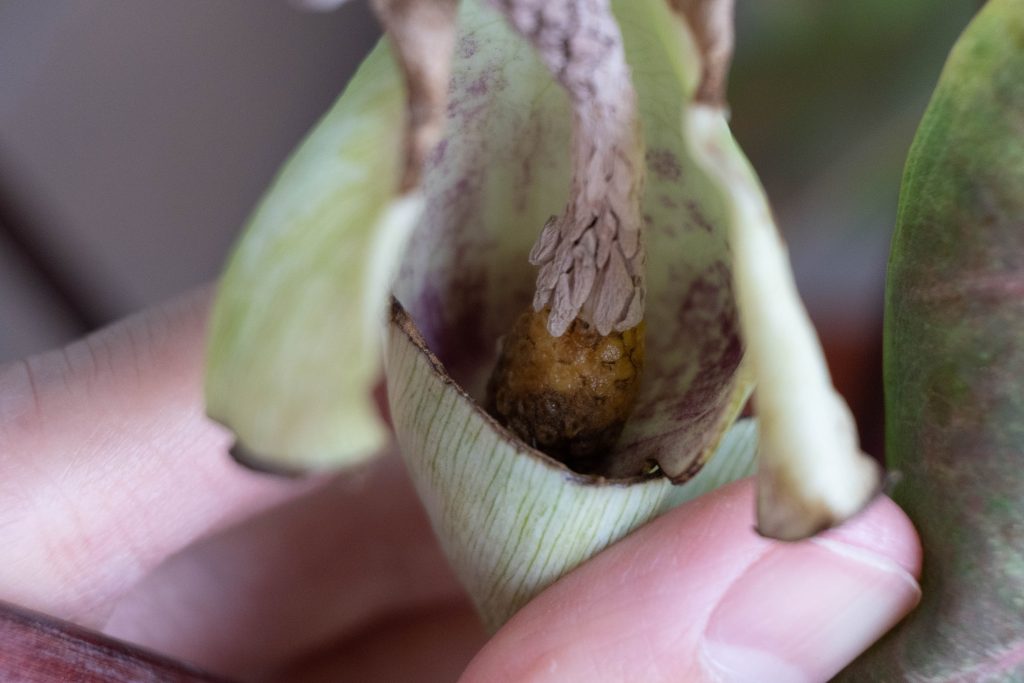
5. When you see dark rings around each fruit, your pollination has succeeded!
So now, how do you know if your pollination has succeeded? Within a week or so, you should be able to find out. A successfully pollinated caladium flower should have dark rings around each fruit – we spotted this just 2 days after pollination! If it has failed, the female part will show signs of rotting.

After 1-2 weeks, a successfully pollinated flower should look something like the photo below. This was taken 10 days after pollination.
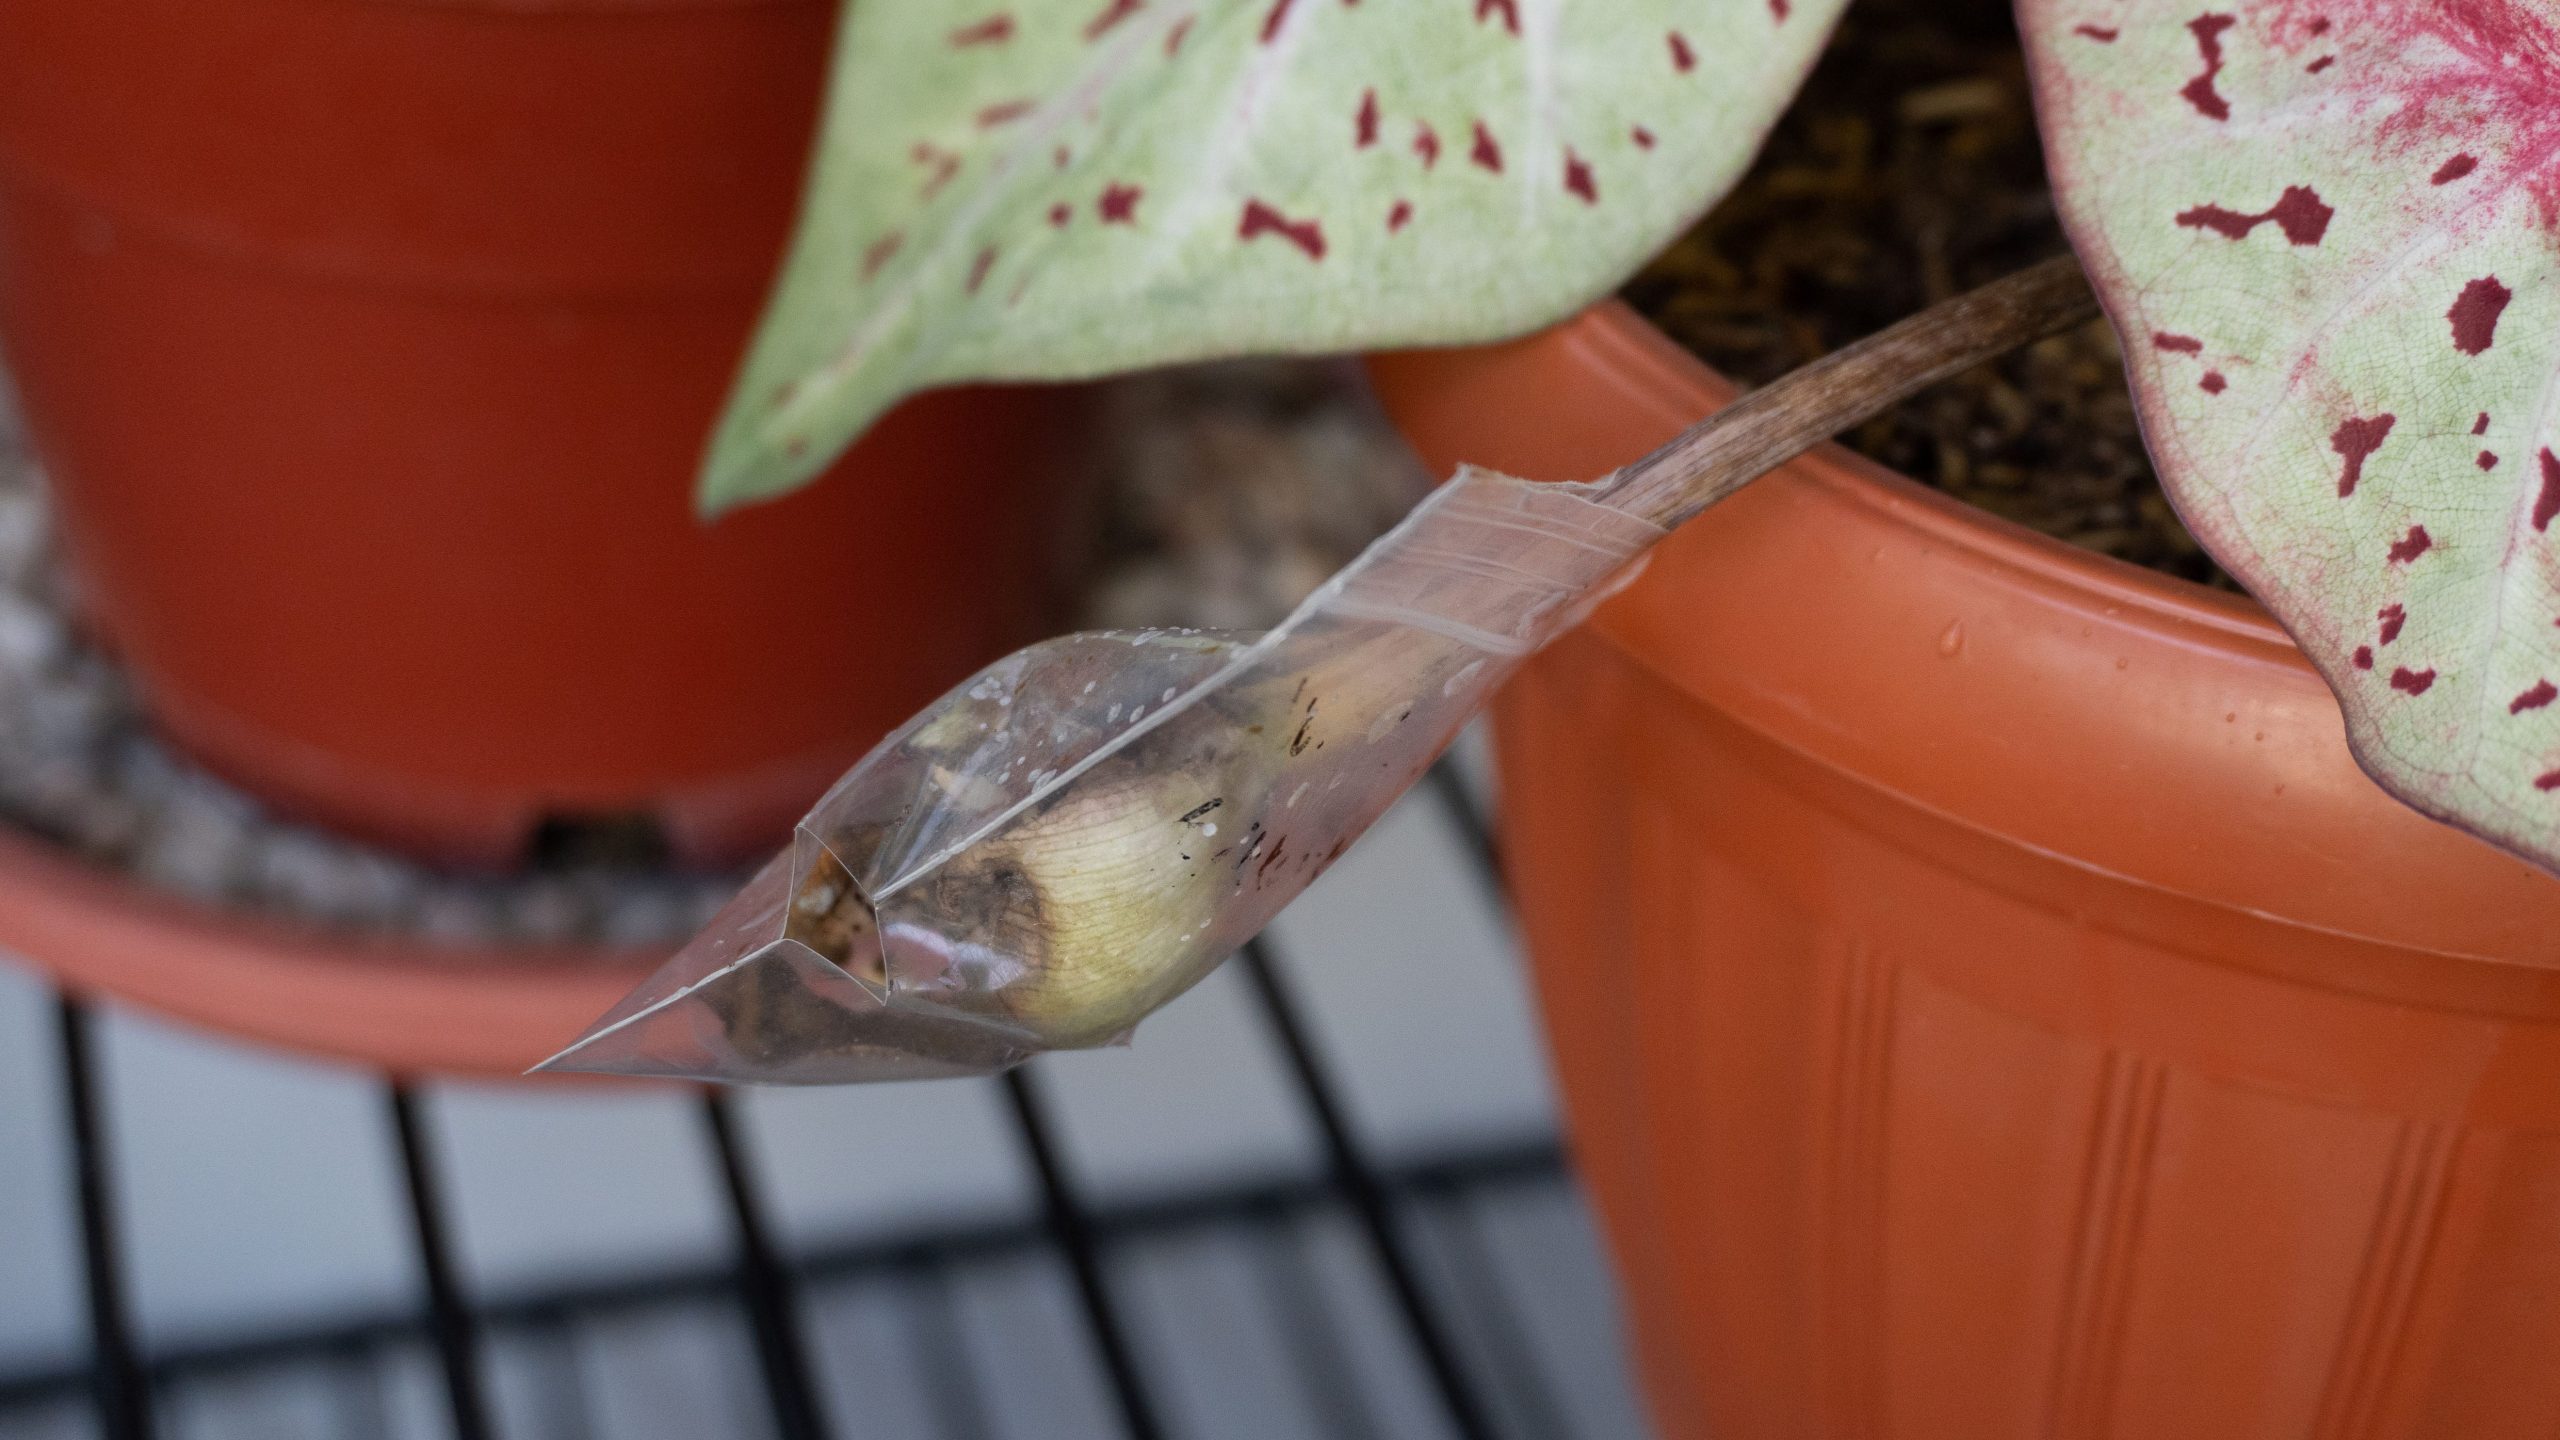
6. Protect the flower and wait for your caladium fruits to ‘pop’ in about 1 month’s time
Now that you’ve gone through all that hassle, remember to protect your pollinated flower! We were experiencing crazy thunderstorms with strong winds then, so we used a small ziplock bag (with a tiny hole for ventilation in case of rot) to protect the flower. Also, the bag will help to catch the fruits when they ripen and drop out of the flower.
It should take about 4-6 weeks for the the fruits to be ripe and ready for harvesting. Be patient!
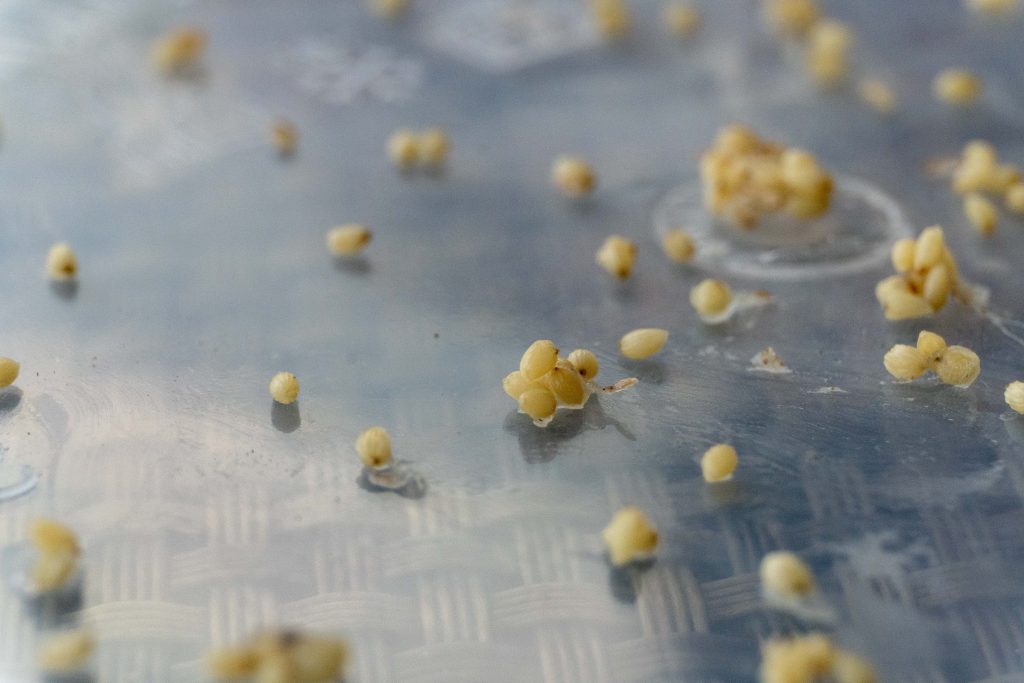
To learn about how we harvested the fruits and germinated the caladium seeds, do check back for part 2 of this series!
Till then, happy growing fellow growers. 🌱👩🏻🌾